

Sass It Up: Elevate Your Style Sheet Game
Maintainable CSS: Organizing Stylesheets with Sass

A Front-end Engineer and Technical Writer
Welcome to the world of Sass, a dynamic CSS preprocessor merging code and creativity to craft stunning interfaces. Explore Sass's functionalities for more maintainable stylesheets, seamlessly blending design and code precision.
Sass is easy to learn and can be picked up on a weekend whether you're a seasoned developer or a beginner.
Prerequisite
To get the most out of this piece, one should:
Have a basic understanding of HTML and CSS
Knowledge of the Command Line (for installation)
Text editor (vscode preferably).
Let the Sass Symphony begin!
What is Sass?
Sass, which stands for Syntactically Awesome StyleSheets, is a CSS preprocessor/precompiler that enhances the abilities of modern CSS.
It presents features such as variables, nesting, mixins, and more, allowing developers to write more readable, maintainable, and efficient stylesheets.
Sass code can not be interpreted by the browser which is why it has to be compiled into standard CSS, which browsers can interpret.
This preprocessor significantly simplifies the task of styling web applications making it a valuable tool for front-end developers.
How Does Sass Work?
Sass code is written using an extended syntax that includes features like variables, nesting, mixins, and more.
Sass uses
.sassand.scssfile extensions.The
@prefix in Sass is crucial for essential tasks such as defining variables, creating mixins, and employing control directives.In as much as Sass has significant similarities to CSS, the browser does not read Sass code therefore it must be compiled. This is typically done using a GUI application or directly through the command line (CLI).
The output of the Sass code is then compiled into a CSS file. Sass must be compiled to standard CSS which is then linked to the HTML document, browsers then interpret and apply the styles as intended.
Why Use Sass?
Sass is extremely popular for the functionalities it offers, which include
Nesting
With Sass, developers can nest their codes similar to nesting in HTML. Sass nesting is a feature that allows CSS selectors to be nested within one another, which enhances the clarity of style hierarchy representation by eliminating the need to repeat the parent selector for each nested rule.
With indentation, developers can convey the relationship between selectors in Sass.
For example:
// Sass syntax (indented)
$primary-color: #3498db

body
  font-family: 'Poppins', sans-serif
  background-color: $primary-color

  .container
    width: 80%
    margin: 0 auto

  h1
    color: darken($primary-color, 10%)
The above example illustrates how the Sass code is presented within a .sass file extension.
// SCSS syntax (CSS-like)
$primary-color: #3498db;

body {
  font-family: 'Poppins', sans-serif;
  background-color: $primary-color;

  .container {
    width: 80%;
    margin: 0 auto;

  h1 {
    color: darken($primary-color, 10%);
  }
}
This above code illustrates Sass being represented within a .scss file.
The .scss file extension is usually preferred over the .sass extension as it uses the same syntax as standard CSS, making it easy to read and comprehensive.
After compilation, the resulting content in a CSS file will be displayed as:
/* Compiled CSS syntax */
body {
  font-family: 'Poppins', sans-serif;
  background-color: #3498db;
}

body .container {
  width: 80%;
  margin: 0 auto;
}

body h1 {
  color: #1d6ea4;
}
Variables
Sass variables allow developers to store and reuse values throughout the stylesheet.
Here's a simple example:
// Declaration of Sass variables
$primary-color: #333;
$font-stack: 'Poppins', sans-serif;
$base-padding: 10px;

// Usage of Sass variables
body {
  font-family: $font-stack;
}

.container {
  padding: $base-padding;

  a {
    color: $primary-color;
  }
}
In the above example,
$primary-color: Holds the value#333$font-stack: Stores the font stack‘Poppins’, sans-serif$base-padding: Represents the padding value10px.
By using these variables, you can easily update the styles by modifying the variable values, making it an easy and flexible way to maintain and manage your styles.
Partials
This is a Sass file containing segments of CSS or Sass code typically meant to be included or imported into the main Sass file.
Partials are named with an underscore at the beginning of the filename (e.g._utilities.scss, _media.scss, _config.scss etc).
They are useful for breaking down stylesheets into manageable pieces.
Example of a _config.scss partial:
// _config.scss
$primary-color: #fff;
$font-stack: 'Poppins', sans-serif;
Imports
This allows developers to include the content of one Sass file into another. This facilitates the organization of your styles by keeping related code in separate files.
When using @import, it's not necessary to write the file extension, Sass will look for files with the specified name.
Example of importing _config.scss into main.scss:
// main.scss
@import 'config';

body {
  font-family: $font-stack;
  color: $primary-color;
}
In this example, the @import 'config'; line brings in the variables defined in _config.scss.
After compilation, the imported code merges with the main Sass code, producing a unified CSS output. This approach allows you to submit a single CSS file to the server, simplifying the deployment process.
Functions
Reusable pieces of functionality that return values can be defined using Sass. Developers can use them to perform calculations, manipulate colors, and more.
Here's a simple syntax:
// Function to calculate the width of an element in percentage
@function calculate-width($container-width, $element-width) {
  @return ($element-width / $container-width) * 100%;
}

.container {
  width: 80%;
}

.element {
  width: calculate-width(80%, 40%);
}
In this example, the calculate-width function calculates the percentage width of an element based on the container width.
Mixin
From the name, one must have an idea of what this Sass function does. In Sass, Mixin allows developers to group CSS declarations and reuse them throughout your stylesheets.
They can also take arguments, making them versatile for various styling scenarios.
Here's an example:
// Mixin for creating a box-shadow
@mixin box-shadow($x, $y, $blur, $color) {
  box-shadow: $x $y $blur $color;
}

.card {
  @include box-shadow(2px, 2px, 10px, #555);
}

.button {
  @include box-shadow(1px, 1px, 5px, #333);
}
The above example illustrates a very simple way of utilizing the Mixin functionality in Sass. What a beaut!
Conditionals
conditional statements, including @if, @else if, and @else, enable you to apply styles based on specified conditions.
Here's an example illustrating the use of conditionals:
// Function to determine text color based on background brightness
@function get-text-color($background-color) {
  $threshold: 128; // Adjust this threshold as needed

  @if (lightness($background-color) > $threshold) {
    @return #333; // Dark text for light background
  } @else {
    @return #fff; // Light text for dark background
  }
}

// Example usage
.container {
  background-color: #f0f0f0;
  color: get-text-color(#f0f0f0); // Automatically selects text color based on background
}
In this example, the get-text-color function takes a background color as an argument and uses the lightness function to determine if the background is light or dark. Based on this condition, it returns an appropriate text color for it.
Adjust the $threshold variable to fine-tune the brightness threshold for switching text colors. This demonstrates how you can use @if statements within Sass functions to create dynamic and condition-based styles.
Operators
In Sass, operators allow you to perform operations on values, making it easier to calculate and manipulate styles. Here are some common operators used in Sass:
- Arithmetic Operators which include
+(addition),-(subtraction),*(multiplication), and/(division). For example,
// Arithmetic Operators
$sum: 10 + 5; // Results in $sum having the value 15
$difference: 20 - 8; // Results in $difference having the value 12
$product: 6 * 4; // Results in $product having the value 24
$quotient: 48 / 2; // Results in $quotient having the value 24
- Comparison Operators:
==(equal to),!=(not equal to),>(greater than), and<(less than). For example,
// Comparison Operators
$result: 10 == 10; // Results in $result having the value true
$result: 5 != 10; // Results in $result having the value true
$result: 15 > 10; // Results in $result having the value true
$result: 5 < 10; // Results in $result having the value true
- Logical Operators: which include
and,or, andnot. For example,
// Logical Operators
$result: true and false; // Results in $result having the value false
$result: true or false; // Results in $result having the value true
$result: not true; // Results in $result having the value false
These operators act as essential tools for performing calculations, making decisions, and applying styles dynamically in your Sass stylesheets.
Sass provides a range of essential features, many of which offer predefined styling. This aids developers in adhering to the 'DRY' principle, which stands for Don't Repeat Yourself.
Let's proceed to installation.
How To Install and Use Sass
There are many ways of installing a Sass preprocessor. It can be done via CLI or GUI.
Let’s have a look at the Command Line Interface (CLI) installation.
Step 1: Install Node.js
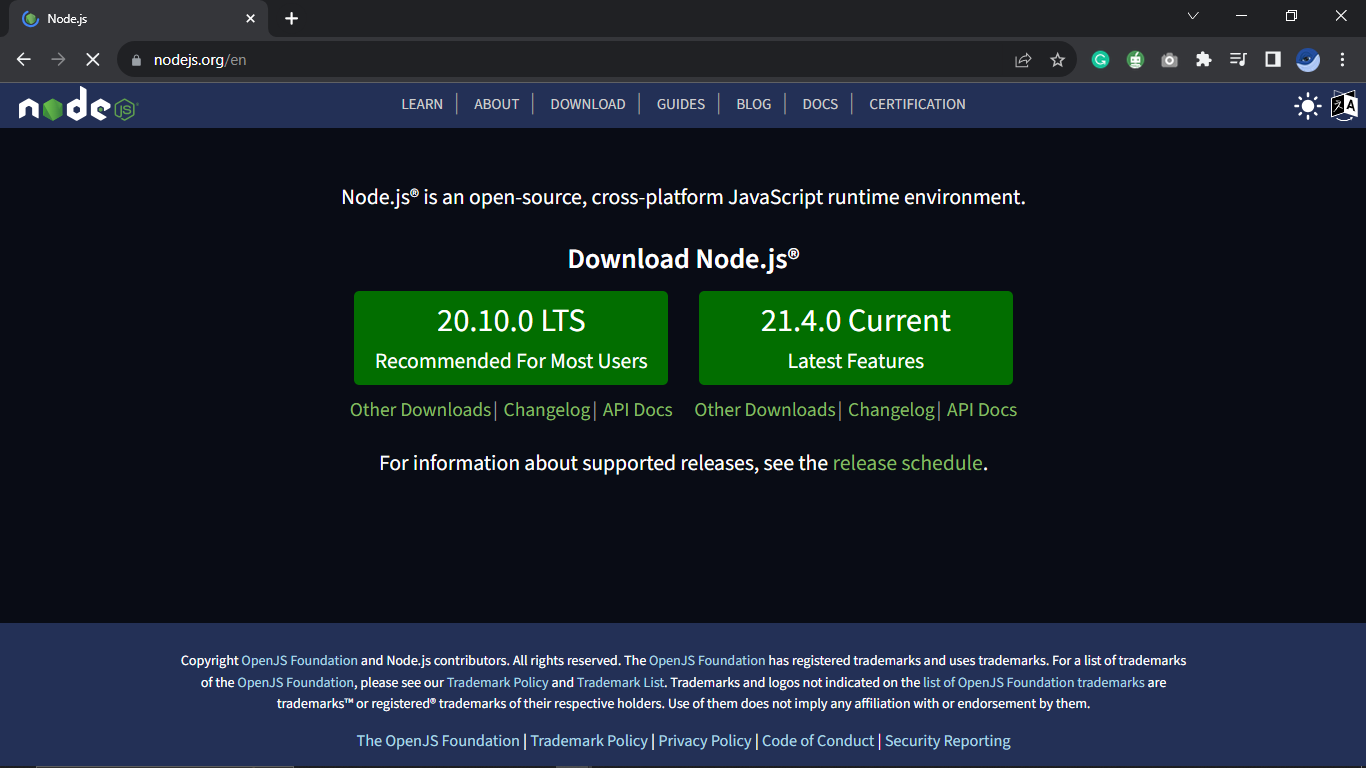
Node.js is an important tool to have when it comes to the Sass preprocessor. It can be installed via the official website here or using the command sudo apt install nodejs npm on the terminal.
To verify the installation, run the commands node -v and npm -v to check the Node.js and npm versions.
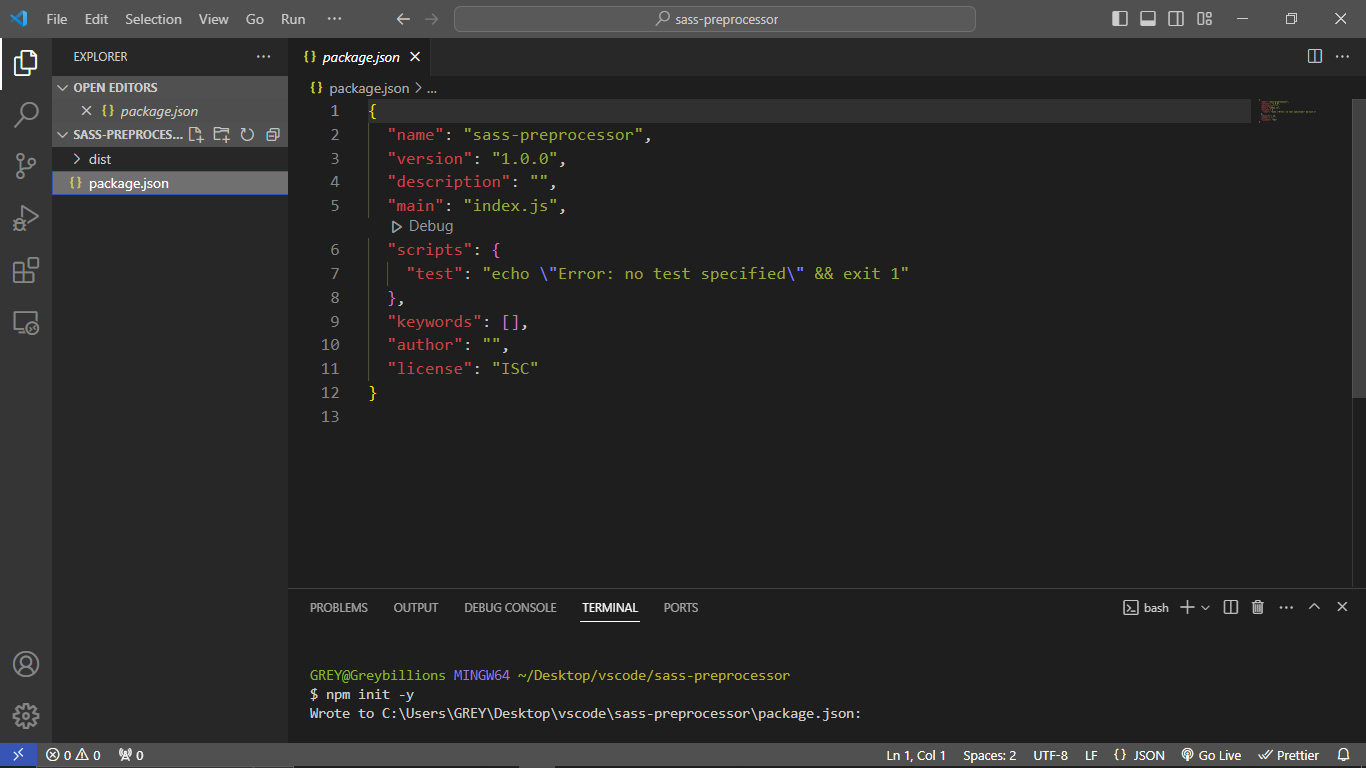
Step 2: Create a package.json file
Launch VSCode and open the Sass project folder. Access the integrated terminal and execute the command npm init -y to generate a default package.json file which should look like this:
Step 3: Install Node-Sass
Run the command npm install node-sass to install Sass. Upon completion, node-sass will be added to a directory named node_modules and documented as a dependency in the package.json file, as illustrated below:

Step 4: Create an npm script
To use node-sass, create an npm script within the package.json file.
Replace "test": "echo \"Error: no test specified\" && exit 1" with "sass": "node-sass -w scss/ -o dist/css --recursive" as seen below:

Save and close the file.
Step 5: Create the required files and directories

Create the following directories respectively
distfolder – this is where the main files will go including the compiledcssfile.scssfolder – where allscssfiles will go.main.scssfile – must be within thescssfolder.cssfolder – within thedistfolder.main.cssfile – inside thecssfolder.index.htmlfile – within thedistfolder as seen above.
Step 6: NPM run Sass
Run the command npm run sass

Apparently, node-sass activates and recursively monitors the scss folder, compiling its contents, and placing the output into the dist/css/main.css directory until the command is canceled.
Step 7: Sassy Styles
link the index.html file to the main.css and open the HTML with a live server to try out Sass styling.
Let's test it out by creating some variables in the Sass file.
HTML:
<body>
    <div class="card">
      <h1>Welcome to my blog</h1>
    </div>
</body>
Scss:
// Declaring the Variables
$primary-color: green;
$secondary-color: red;
$other-color: steelblue;
$light-color: white;
$font-stack: 'Poppins', sans-serif;

// HTML Reset
* {
  padding: 0;
  margin: 0;
  box-sizing: border-box;
}

// Applying the variables
body {
  font-family: $font-stack;
  background: $other-color;
}

.card {
  background: $primary-color;
  width: 250px;
  height: 250px;
  border-radius: 50%;
  margin: auto;
  display: flex;
  justify-content: center;
  align-items: center;
  margin-top: 10rem;

  h1 {
    text-align: center;
    color: $light-color;
  }
}
Result:

It works perfectly.
What Next?
To adhere to best practices, create a .gitignore file and include all files and directories except the dist directory.
Only the dist folder should be pushed to Git, while the others are reserved for the build environment.

As seen above.
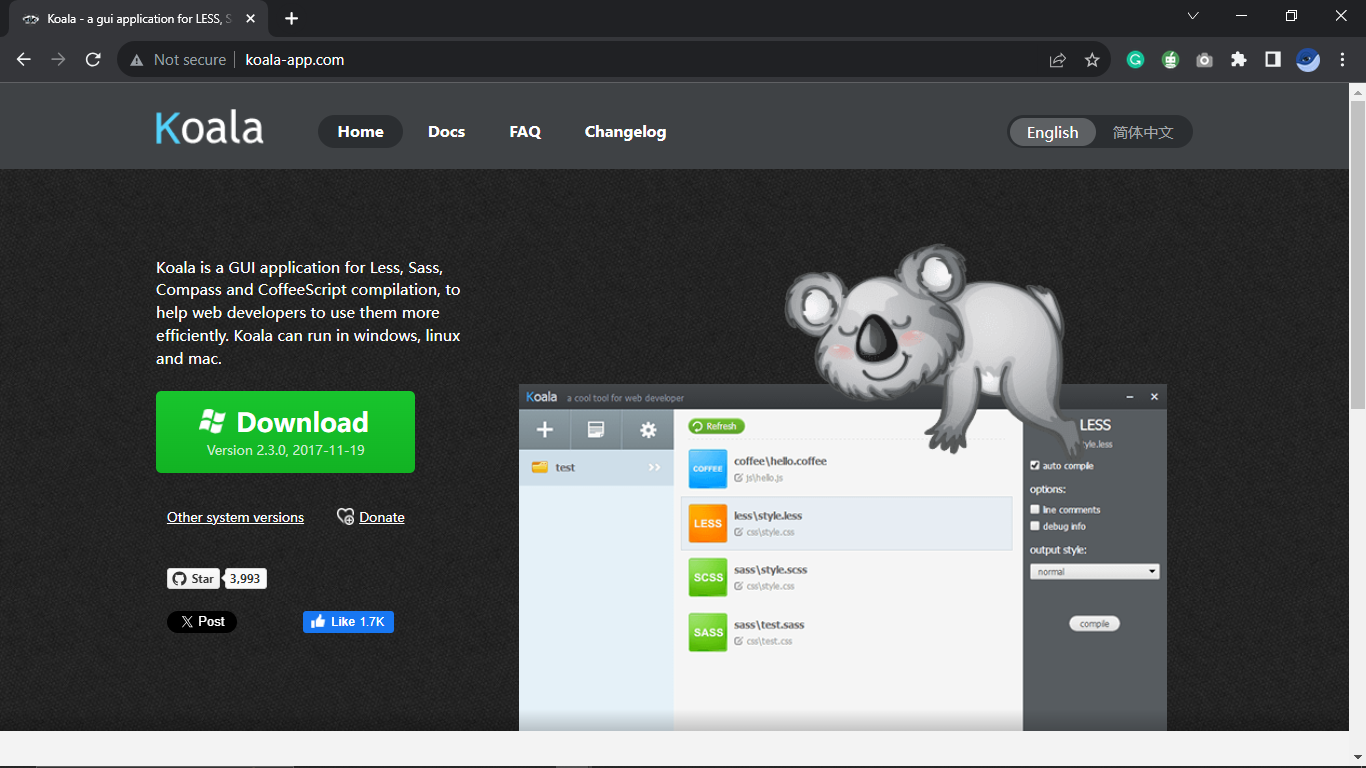
GUI Precompiler
The Graphical User Interface Sass precompiler is easier to use. Kindly visit Koala to download the application for both MacOS and Windows.
Follow the instructions in sequence to set it up and get it running.
Conclusion
In conclusion, diving into the world of Sass opens up a realm of possibilities for enhancing your web development projects.
With powerful features like variables, mixins, and nesting, Sass streamlines your stylesheets, making them more maintainable and efficient.
By embracing the "DRY" principle and leveraging advanced capabilities, you not only write cleaner code but also promote reusability and scalability.
Whether you're a seasoned developer or just starting, incorporating Sass into your workflow empowers you to create captivating and responsive web interfaces.
The Sass journey is not just about stylesheets; it's about transforming the way you approach and enjoy the art of web design.
Further Resources
Sass official Documentation
Sass Guidelines
Sass Basics
For exploring other CSS preprocessors beyond Sass, also check
Happy coding!


